08 May 2013
by Kate
in Uncategorized
Tags: coupon book, coupon template, mother's day, mothers day carat

Just print this off on different colored paper. Punch a hole in the ends with a hole puncher. Let the kids color away and then decide what each coupon will be for. Super cute. Will melt Mom’s heart. I made up a different template that I like better than the one in the picture above. Feel free to print this post off and use my template.
This coupon is much better that the one I originally made 🙂

08 May 2013
by Kate
in Uncategorized

This couldn’t be easier…
What you need:
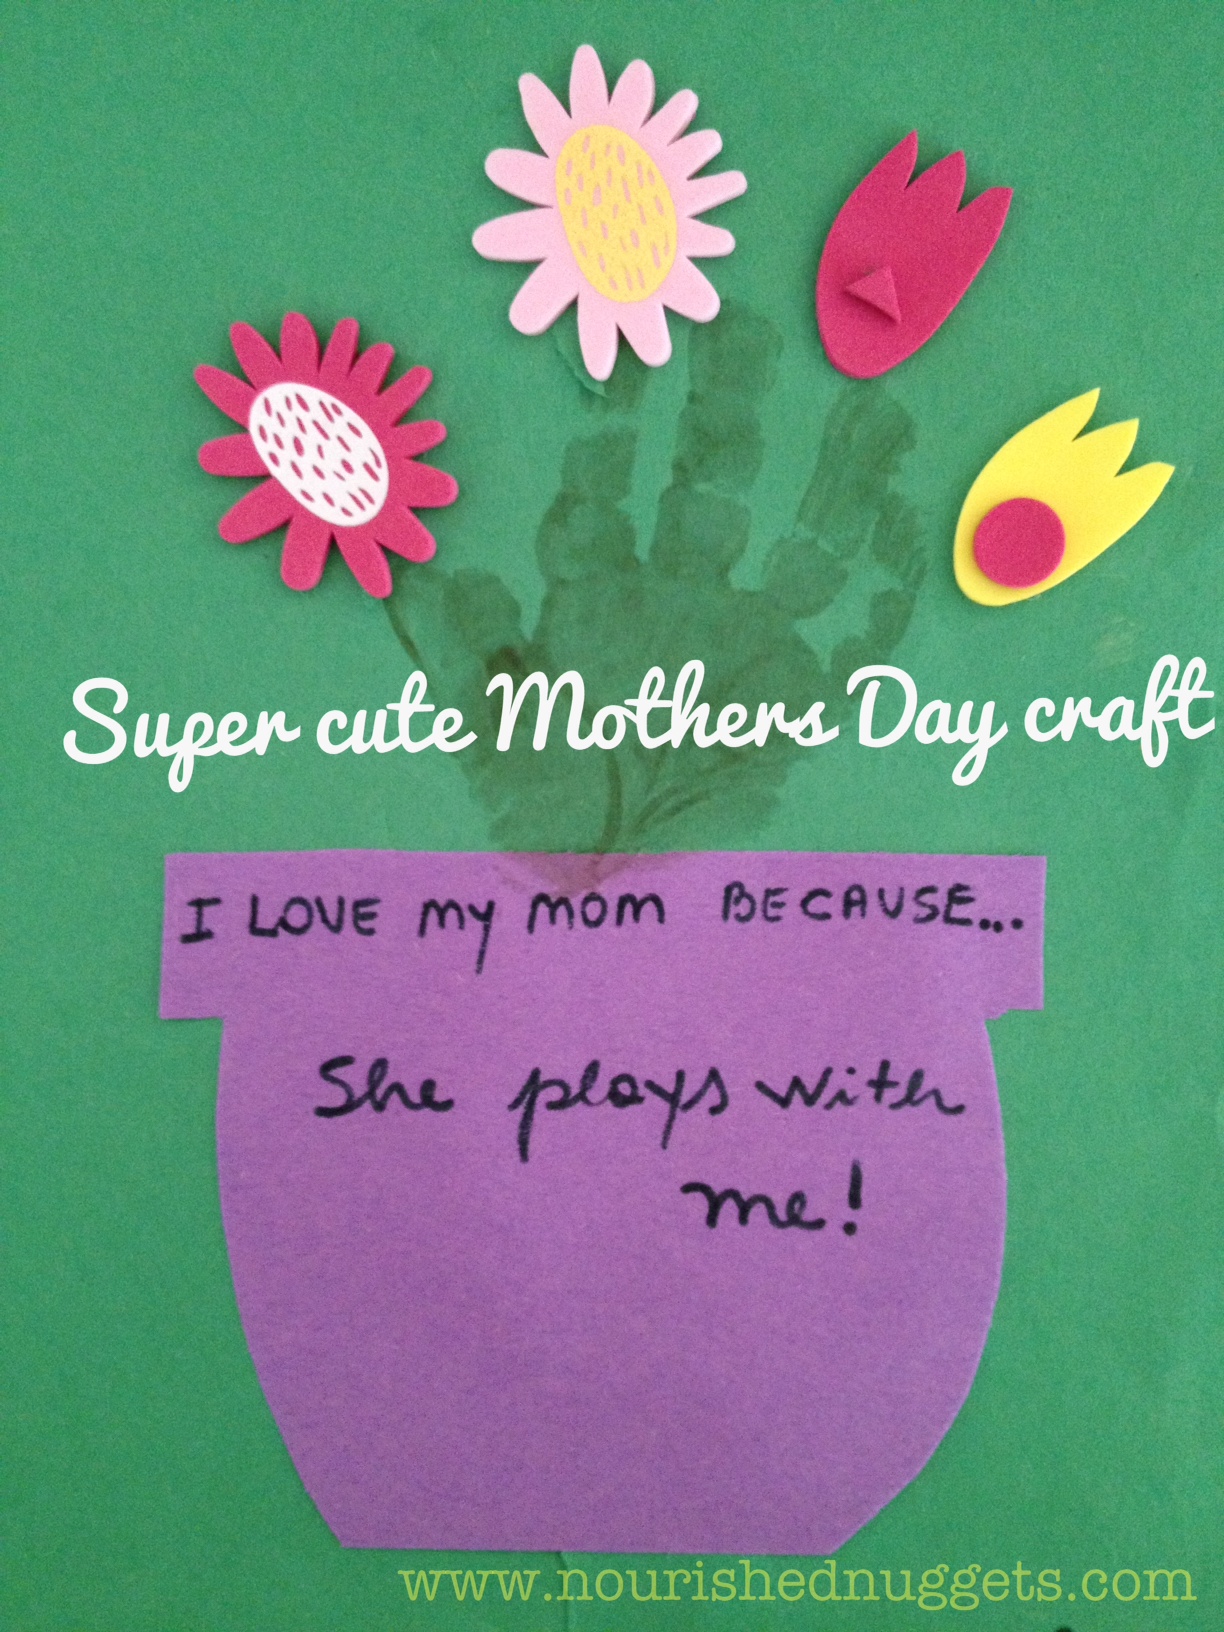
Pour some paint onto a plate, dip your child’s hand in it. Make a print on the paper. Let dry. The fingers become the “stems”. After its completely dried then add the stickers. Glue on the pot. Tada! A super cute and easy Mother’s Day craft
08 May 2013
by Kate
in DIY
Tags: bubbles, Corn starch, Dishwashing liquid, DIY kid, Soap bubble, summer

My kids would play with bubbles ALL DAY if they could, but the bubble solutions tends to run out fast. In a pinch I made up my own batch and it worked great! Make your own bubbles!
Ingredients:
- 12 cups of water
- 1 cup of dish soap
- 1 cup of cornstarch
- 2 Tbsp baking powder
Mix well and have fun! We have this awesome automatic bubble blower. Hands free, so it frees up some time for me while keeping the kids happy with a steady stream of bubbles coming out. Win, win! Get one HERE.
12 Apr 2013
by Kate
in Toys
Tags: old photos, Puzzles, recycled toys, Recycling
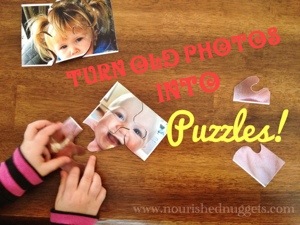
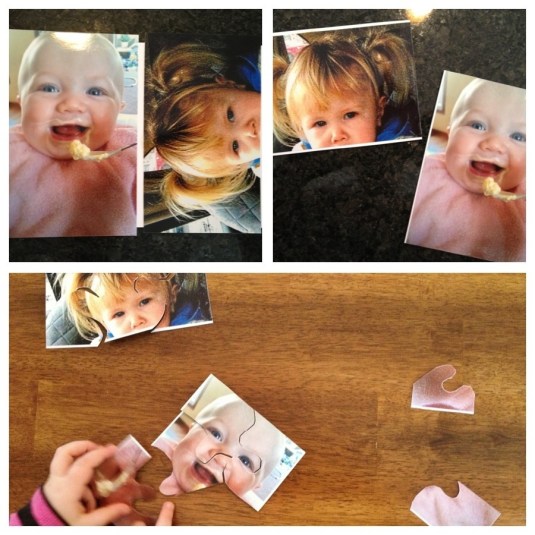
My daughter is going through a major puzzle phase lately and I think we have bought all of the puzzles that Target carries. We love recycling stuff so I decided to make her a few puzzles out of some old photos I had left over from scrapbooking. Bonus: she giggles the entire time putting them together because they are silly family photos!
Materials:
- Cardboard (reuse a cereal or cracker box)
- Old pictures
- Glue stick
- Scissors
Directions:
- Glue the pictures to the cardboard. If you want a double sides puzzle you can keep the cereal box design as the other side. Make sure to glue every inch down so it doesn’t peel apart
- Trim excess cardboard from edges
- Cut into puzzle shapes (If you’re really handy you could glue it to a thin board and cut with a saw. I don’t have a saw so we are sticking with cardboard)
11 Apr 2013
by Kate
in Uncategorized
 NurseMomPaleo

So my daughter recently developed a fear of Witches. Why not? I remember being intensely afraid of the Witch of the West when I was a kid! Every night at bedtime it’s a battle though. So, I came up with an idea: “Anti-Witch spray”.
Directions:
Add water and a few drops of lavender essential oil to a spray bottle. Spray wherever the witches might be right before bed time. Use liberally as lavender promotes relaxation (it makes your little one fall asleep faster). We use it every night before bed and when she has the occasional nightmare. Works every time! Smells great too!!!
You can also make this to scare off monsters, ghosts, Swiper (the sneaky fox), or whatever the current fear is…
View original post
10 Apr 2013
by Kate
in Toys
Tags: creative recycling, kid crafts, nylons, Pantyhose, recycle, recycled kids toys
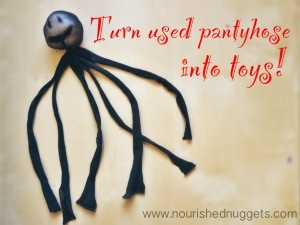
We love to recycle things into toys in our house. It keeps the kids creative thinking caps on, and it also saves some cash. We had a baptism party this weekend and I snagged my nylons beyond repair. Of course we had to come up with something to do with the nylons immediately once we got home.
Here are a few of the ideas we tried:
- Pantyhose octopus (pictured above): Fill the nylon with cotton balls until you have a good-sized “head”. Then tie off at the neck and cut the base into strips to form the legs. Draw a face on with a sharpie. These are actually really fun to throw at each other!
- Bean caterpillar: We filled the nylon with dried beans and tied off the stocking every two inches. This made a caterpillar shape and the kids had fun sorting and counting the beans as they put them inside the stocking
- Snowballs: Fill the stocking with cotton (We reuse the cotton from vitamin containers) and tie the ends. Shape into balls. These are great because they are super lightweight and you can have a “snowball fight” without worrying about breaking stuff in the house!
Stuff we plan to make with the next pair that I destroy…
26 Mar 2013
by Kate
in Holidays
Tags: Easter, easter basket, Easter egg, Easter gifts for Grandparents, mailing easter eggs, Pipe cleaner

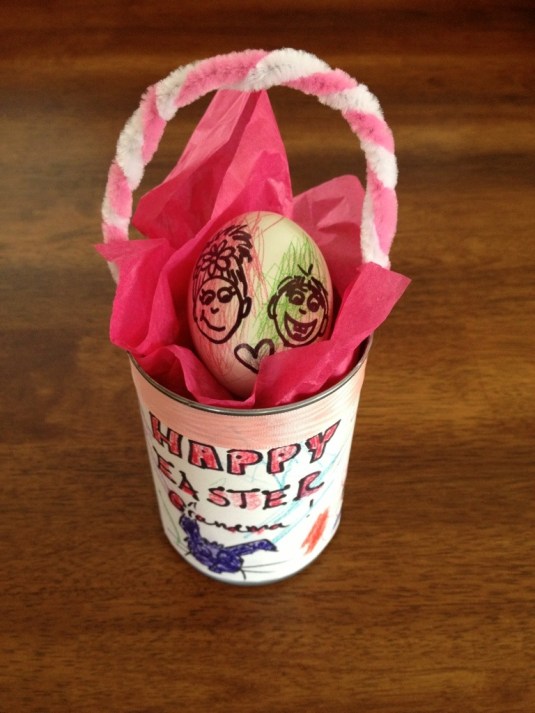
As you can see from my previous posts, we are up to our eyeballs in decorated Easter eggs! Some on our tree, some in holders, and the rest are going to the Grandparent’s as Easter gifts. We are bringing some along to the festivities this weekend and mailing others to family who won’t be here. I was trying to figure out ideas for “presentation” and also packaging for sending them in the mail. Opening up a can of coconut cream for a tasty Paleo treat today, it dawned on me that the can would be perfect for both presentation and package. A cute little can basket, that also serves as a solid vessel to mail the egg in so it will arrive intact at Grandma and Grandpa’s on Easter in one piece. So Ellie got out her colored pencils and we got started. I think it turned out pretty cute!
Materials:
- tin cans with labels peeled off (and washed out of course)
- paper
- pencils
- tape
- pipe cleaners
Directions:
- Cut a strip of paper large enough to cover the can where the label had been.
- Decorate the label
- Tape it to the can
- Tape the pipe cleaners to the inside and make a little handle for the “basket”
- Fill with tissue place the egg inside and voila…a basket that can be mailed and keep your precious egg intact!
If you need more ideas for decorating your eggs, check out these posts:
24 Mar 2013
by Kate
in Uncategorized
Tags: dyeing Easter eggs, Easter egg, Easter eggs, natural egg dyes, non-toxic egg dye, onion skin dye

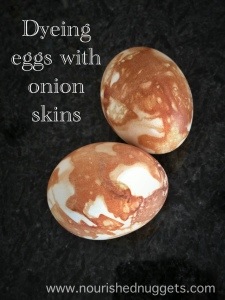
We are having an Easter egg decorating extravaganza in our house lately. We have blown out eggs and drawn on them, hardboiled eggs and dyed them, and now we are trying out a method that takes a bit more time but is well worth the effort. Using onion skins creates the most beautiful patterns on the eggs. I have dyed hard-boiled eggs with onion skins before and absolutely hated cracking them and destroying the beautiful marbelized eggshell. So this year I blew out the contents of the eggs and dyed the shells. This way I can enjoy my eggs for years to come. Yes, I am an Easter nerd! Here is how to make them:
Materials:
- white eggs (you can either blow out the eggs out or boil them as is and get hard-boiled eggs out of the process)
- red onion skins (try to keep them as big as possible)
- rubber-bands
- cheesecloth (or you can use cloth napkins, but cheesecloth works best)
- 1 quart water
- 2 Tbsp vinegar
Directions:
- Peel onion and place the skins in a pile
- Wrap each egg in an onion skin, covering the entire egg
- Wrap egg and onion skin with cheesecloth and secure it with a rubber-band
- Bring water to a boil and lower the wrapped egg into the water. Add 2 tablespoons of vinegar to the water
- Boil for 20 minutes
- Remove eggs and let cool completely
- Unwrap and enjoy
Put them on display on your Easter egg tree or make cute stands for them.
23 Mar 2013
by Kate
in Holidays
Tags: Blas-fix, blowing out easter eggs, Craft, Easter, Easter craft, Easter egg, Egg decorating, The Egg Tree, ukranian eggs

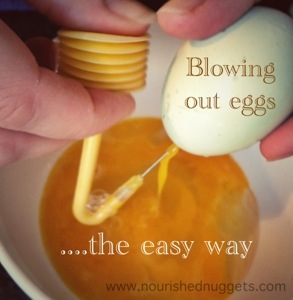
So, I picked up this handy little tool at a Ukrainian Egg decorating store about 5 years ago and we use it every year to blow out the eggs we decorate and hang on our egg-tree. This year our egg-tree is so full that we had to make egg holders for the leftover eggs. For anyone who has drilled holes in eggs and tried to blow out the contents with your mouth…and then experienced TMJ and ear pain (ouch!), this is the tool you have to pick up!
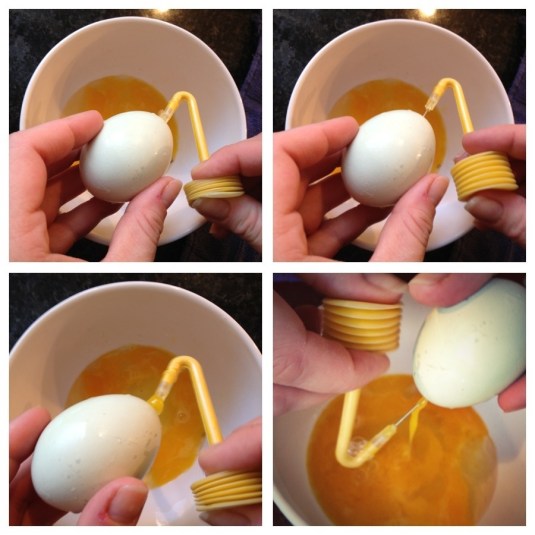
Here’s how it works…
- Use the “drilling” tool to drill a hole in the egg (I didn’t take a picture of that part but its on the package photo). Only drill one hole
- Use the “pumping” tool to pierce and blow out the egg contents through that hole. It basically creates a high pressure inside of the egg that forces the contents out through the hole and the shell remains intact for you to decorate
- Decorate the eggs and keep them to hang on your egg-tree every year

the instructions on the back of the package

a carton full of eggs to decorate

Here is one of the eggs that I decorated for the egg-tree this year
22 Mar 2013
by Kate
in Teach them about their world
Tags: gardening, kid craft, kid garden, salad container garden, starting seeds

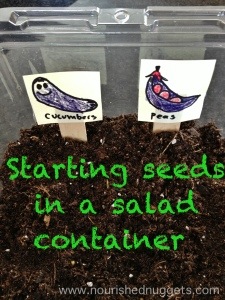
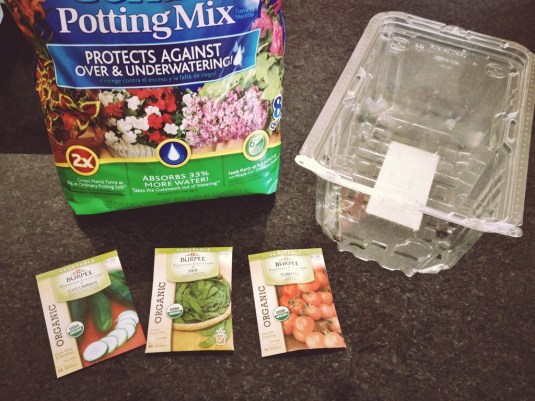
We might be a tad bit early for starting our seeds this year, but this winter has been waaaaay too long here in Minnesnowta! I need something green and sprouting in my life. Plus, a seed packet costs next to nothing and I just love teaching my little hobbits about planting and growing things. We bought one of those garden starter mini green house things from Home Depot, but it currently resides in our garden shed that has a fairly large snow bank blocking the door…..so today we grow seeds in a salad container. I have to admit that I am feeling pretty psyched about this project idea!
Materials:
- 1 large salad container
- 1 bag of black dirt
- seeds that you want to plant
- row markers (we used popsicle sticks)
Directions:
- Allow your little one to do as much of this project as their skill/developmental level allows, it’s very educational and fun!
- Pour about 4″ of dirt into the bottom of the salad container.
- With your finger, draw lines in the dirt about 2″ apart. Your number of rows will depend on the size of your container. We started with 2 rows and plan to add additional containers as our “garden” expands.
- Plant seeds according to your seed packet instructions and cover them with dirt.
- Mark your rows with popsicle sticks and label them. I let the kids decorate the row markers.
- Place cover on top of container and water when needed, not too much and not too little. Watch the moisture level in the container, as too much will cause the seeds to mold and rot.
- Place in a sunny area with the amount of sun indicated on the seed packet.

Previous Older Entries